I made a blue variant also, but I think the green came out better.

A handmade home for woodworkers and admirers of woodworkers. Our community icon is a planter box made by @Captain Aggravated, the winner of our summer '24 woodworking contest. Congratulations!
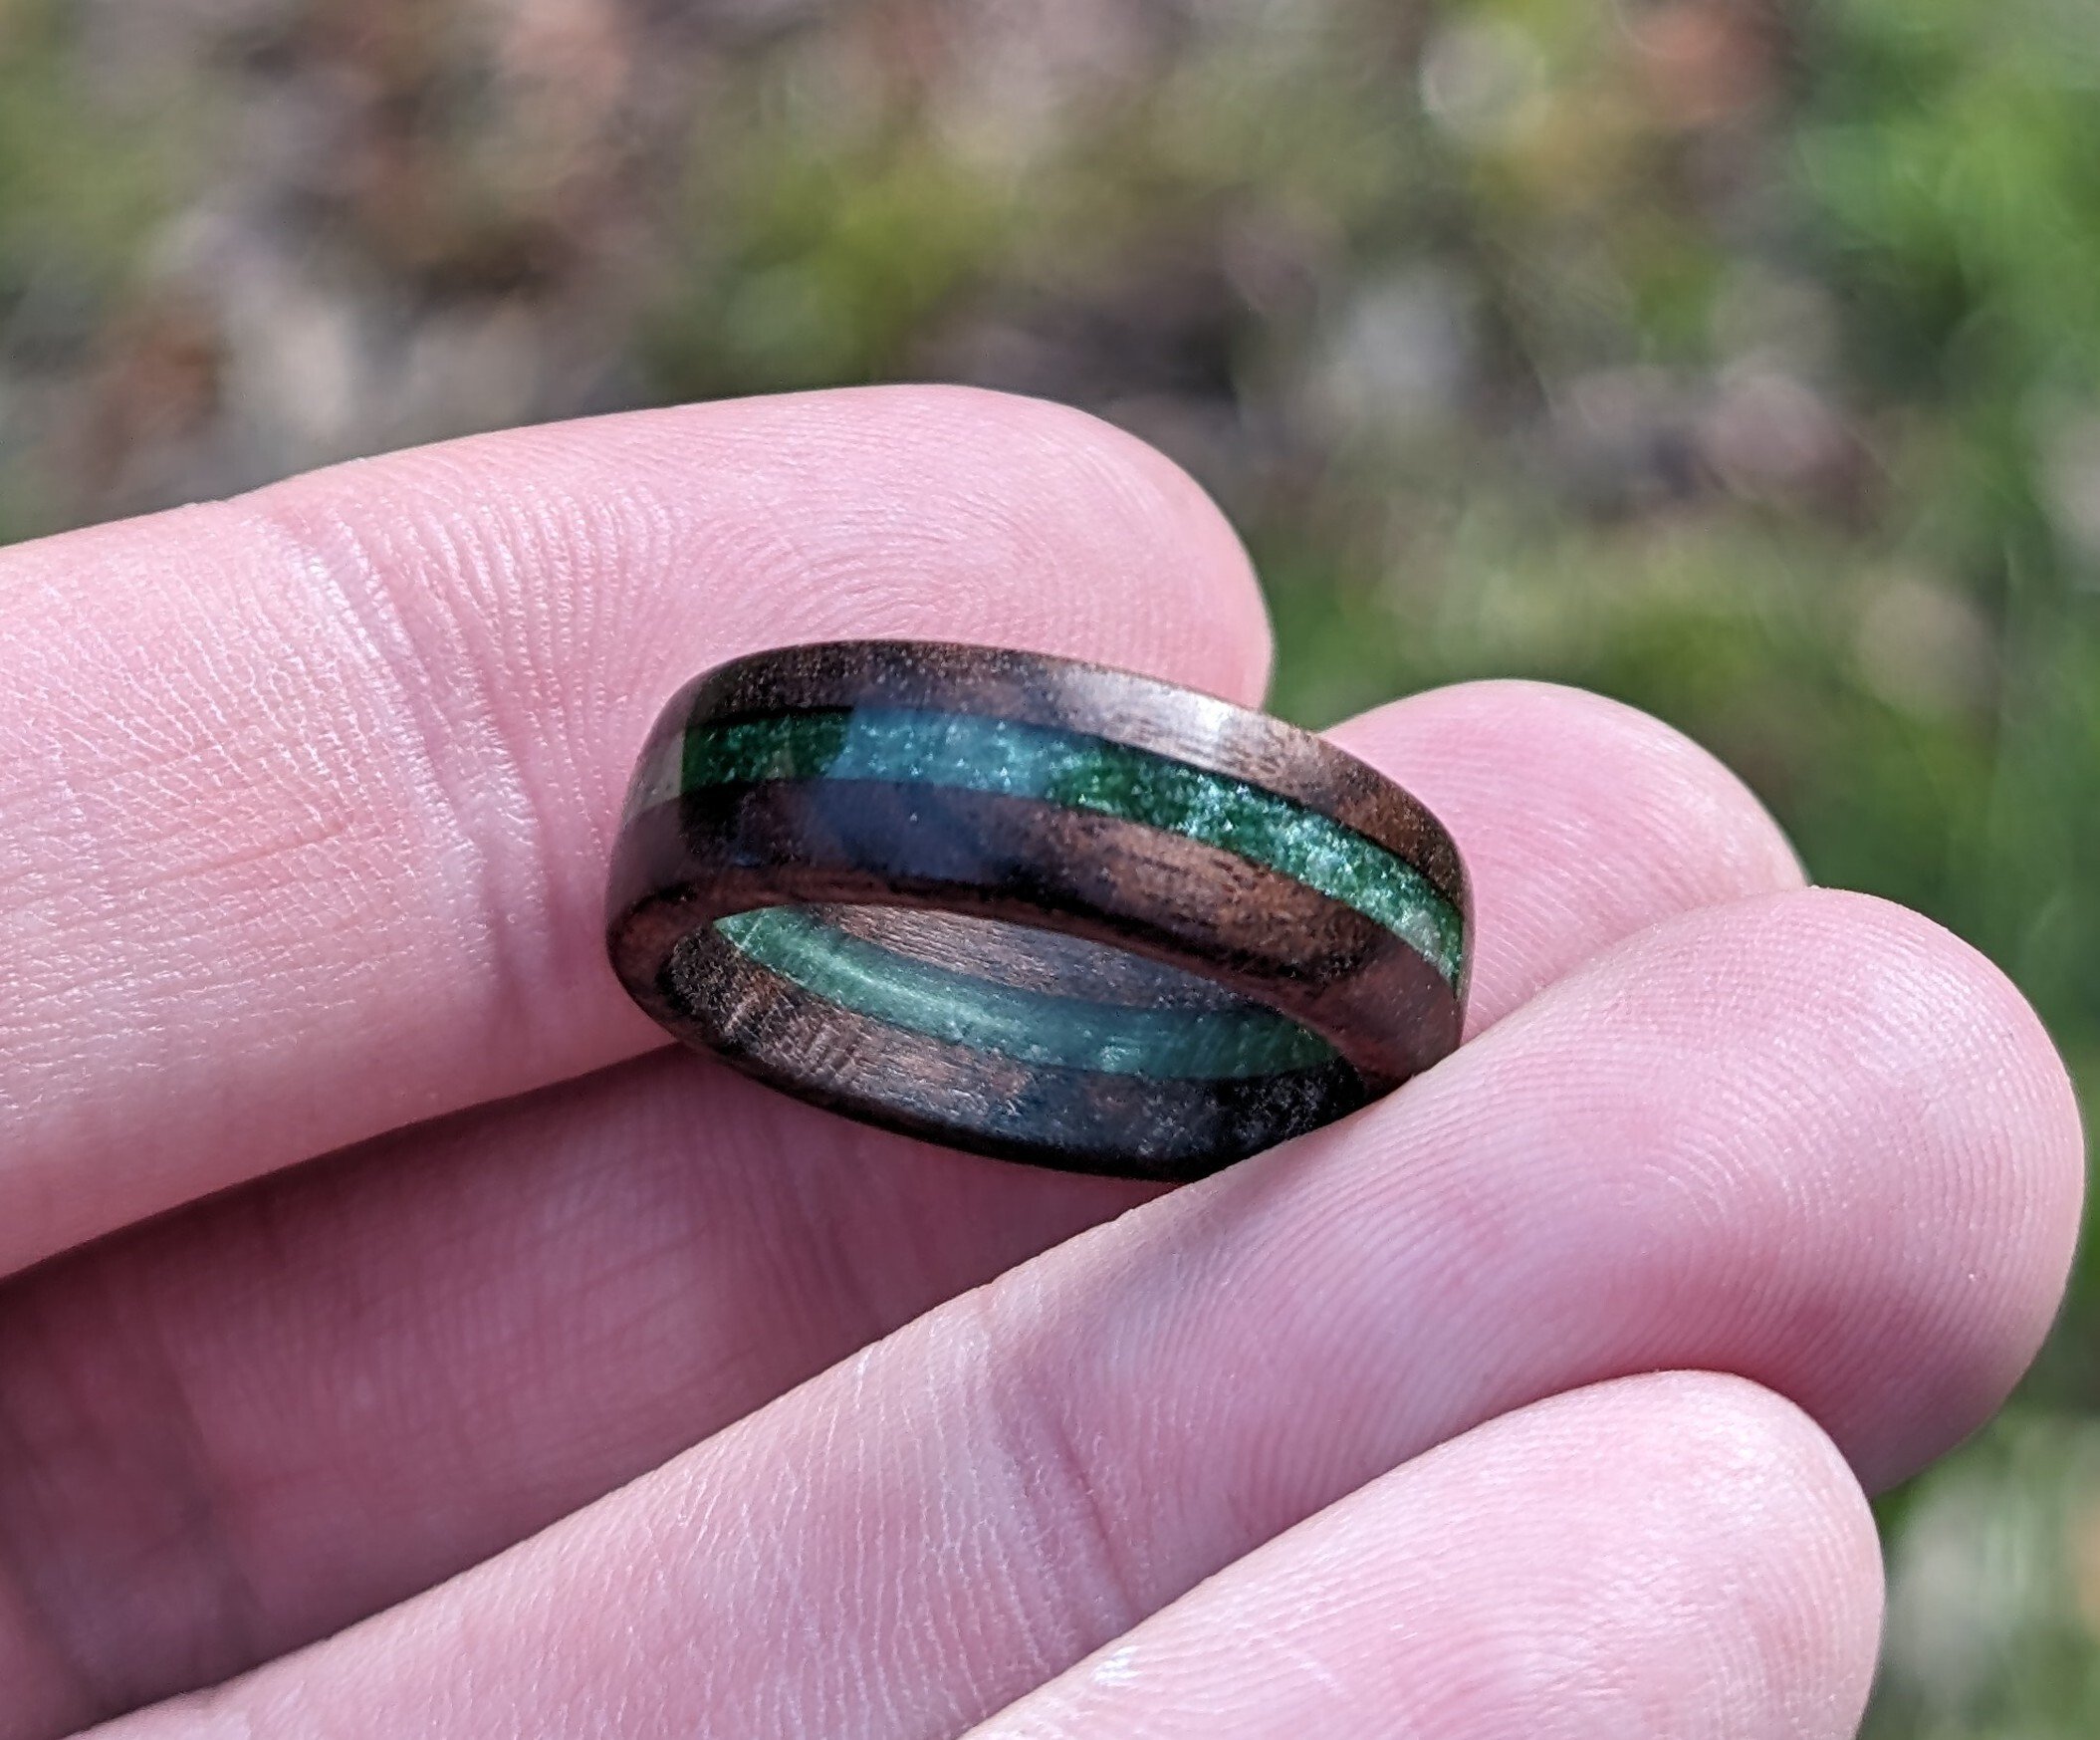
I made a blue variant also, but I think the green came out better.
The green definitely came out better, though I think the blue could come out just as good too if it had the same transparency(?) to it? You probably already have an idea of what you'd do different next time, if I had to guess
Yep. The blue mica powder isn't as sparkly as the green. The next blank I make with blue will need more blue powder and probably a dash of silver to bring out the same "crystal" effect that the green one has.
Ohh, I bet one blue line and one green line would look amazing!
You could probably carve the wood to leave a wavy edge on the epoxy too!
Thank you! That's actually on my list to try next.
Looks awesome! Do you have pictures/steps of how you did it? I would love to give this a try.
I started with 2 thin slices of wood, about the size of a post card. I used toothpicks as spacers at the corners and a dab of super glue to create a gap between the wood for the resin. I used tape around 3 sides, leaving one end open. I poured in the resin very slowly so there wouldn't be any bubbles, and left it in the vacuum chamber, open end up, for about 15 minutes to pull all the air out and get a good bond between the wood and resin. After it cured and I cleaned up the blank I cut the rough shape on my CNC machine. After a quick sanding, a dunk in some Danish oil, and some time to dry they went on a ring mandrill in the drill press where I did the final shaping with sandpaper. I used super glue for the finish, more wet sanding up to 8000 grit and then 3M polishing compound.
Not counting all the curing and waiting, it took about 20 minutes per ring, and was a ton of fun.
My one concern is durability of the rings, as they end up very thin. My finance will be wearing them for a while to see how they hold up. Hopefully, since the resin is solid, it will hold the wood fibers together and prevent the ring from cracking.
Next, I want to try out carving shallow geometric patterns on the side of the wood pieces that go against the resin on the CNC before filling the blanks. I think that'll make some interesting patterns when the ring gets cut out of the blank.
This is so cool! I wanted to do something similar with stone and metal, but resin and wood sounds like a way more realistic goal XD
Beautiful!!!!
That's really beautiful!
I am getting some real LOTR vibes from this in the best way.
Damn those are great looking! Keep up the good work
How much does the wood swell in the summer heat?
Right now I don't know, but it's something we should find out pretty quickly, as my fiance and I will be wearing them daily to test the durability.
Would an epoxy coating help with durability?
I've considered submerging the rings in thinned resin and pulling a vacuum on them, but haven't tried it yet. I didn't know if that would incorporate the resin enough throughout the wood to improve its strength. It's definitely worth a try though. I may also try coating them in UV resin instead of CA glue to see what effect that has. There are some "nano" ceramic coatings used in the auto industry that could give them some extra scratch resistance too.
The major downside to the resin coatings would be significant wait times for curing, and a whole lot of messy cleanup. If it works well it could be worth it though.
Wow this is amazing!! I would easily order one if they were available for sale 🙌
I would be happy to make one for you for just the cost of shipping if you are willing to help me test the durability and other aspects.
DM me if you are interested.
Wow, really appreciate the offer. But the cost of shipping and import to my country would be very substantial sadly. Thanks a lot anyways!
Then you wouldn't order one if they were available for sale, as it would cost money + however much it costs to ship to your country. It wouldn't get cheaper.
It was more of a figure of speech and trying to be nice and show appreciation towards this wonderful craftmanship. Why be such a downer?
I've got one of these! It's a beautiful ring, but more prone to damage than a metal ring. After 5 years of daily use, it has some visible scrapes. I use a silicone ring daily now, and just wear this one for weddings and stuff.
That is stunning, holy smokes. Absolutely gorgeous work!
Just wow! 😃